DIY Night Guard: Methods, Materials, and What Actually Works
Why Go the DIY Route?
Custom night guards from a dentist can run $300 to $800, and that is before insurance plays its usual game of covering half or nothing at all. If you grind your teeth at night and need something now, the idea of making your own night guard at home is perfectly reasonable. Millions of people have done it, and some approaches work better than others.
This guide covers the most common DIY night guard methods, what materials are involved, where each one falls short, and when a homemade approach is a genuinely fine temporary solution. We will also point you toward some affordable options that split the difference between true DIY and a full dental visit.
The Most Common DIY Night Guard Methods
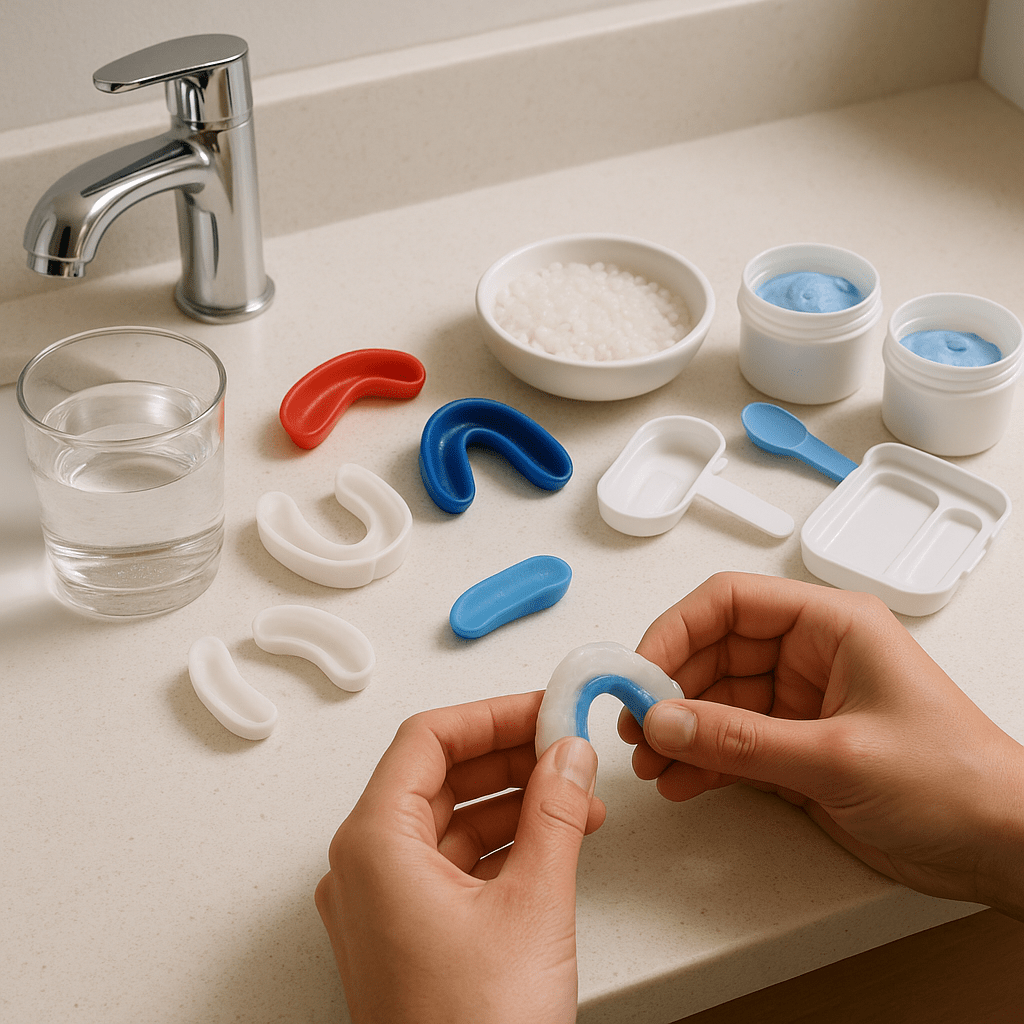
1. Boil-and-Bite Night Guards
This is the most popular starting point, and for good reason. Boil-and-bite guards are cheap (usually $15 to $40), available at any pharmacy, and require zero special skills.
How it works: You drop the thermoplastic tray in boiling water for 30 to 60 seconds, let it cool just enough to handle, then bite down firmly so it molds to your teeth. Most products give you two or three attempts before the material stops reshaping.
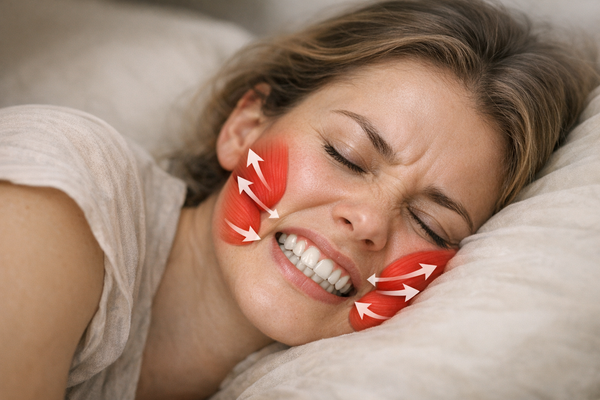
What works: A well-fitted boil-and-bite guard does provide a physical barrier between your upper and lower teeth. For mild to moderate grinding, this can reduce enamel wear and give your jaw muscles something softer to clamp against. A 2020 study published in the Journal of Oral Rehabilitation found that even generic occlusal splints reduced EMG activity in the masseter muscle during sleep, though custom-fitted devices performed significantly better.
Where it falls short: The fit is approximate at best. Boil-and-bite material compresses unevenly, which means your bite force gets distributed in ways that may not match your natural occlusion. Some people find the bulkiness makes it hard to sleep or causes them to produce excess saliva. And the material degrades faster than professional-grade options, typically lasting two to four months with heavy grinding. If you want to understand the differences in durability, our breakdown of night guard materials and their pros and cons goes deeper.
Verdict: A reasonable short-term option. If you are a mild grinder and need protection tonight, a boil-and-bite from a reputable brand (Dental Duty, DenTek, Plackers) is a sensible move. Just do not treat it as a permanent solution.
2. Thermoplastic Sheets (True DIY Molding)
Some people take the concept further by purchasing flat thermoplastic sheets (often EVA or polyethylene) and molding them at home using hot water or a heat gun. This is closer to what a dental lab does, just without the vacuum-forming equipment or the dental stone model of your teeth.
How it works: You heat the sheet until it becomes pliable, then press it over your teeth (or a dental impression you have made) and hold it in place until it cools. Some kits come with impression trays so you can create a mold first and then shape the thermoplastic over it.
What works: If you are patient and willing to go through a few attempts, you can get a surprisingly decent fit this way. The material is the same type used in many professional guards, just applied without professional equipment.
Where it falls short: Thickness consistency is the main problem. Without a vacuum former pulling the material evenly across all surfaces, you end up with thin spots (which wear through quickly) and thick spots (which change your bite). Uneven thickness can actually shift your bite alignment over time, which sometimes creates more jaw problems than it solves. If you have ever wondered why your teeth and jaw hurt after wearing a night guard, uneven pressure distribution is one of the most common causes.
Verdict: Better than nothing, but the failure rate is higher than boil-and-bite because there are more steps to get wrong. Worth trying if you are handy and willing to iterate.
3. Sports Mouth Guard as a Night Guard
This is the "makeshift night guard" approach: grabbing a sports mouth guard off the shelf and wearing it to bed. It is quick, it is cheap, and it sort of works.
How it works: You buy a mouth guard designed for football, boxing, or another contact sport. Many of these are also boil-and-bite, so the fitting process is similar. You wear it to sleep instead of to practice.
What works: It absolutely prevents your teeth from grinding against each other. The material is tough and designed to absorb impact, so it can handle bruxism forces without falling apart immediately.
Where it falls short: Sports guards are built for a different purpose. They are designed to absorb and distribute sudden impact force, not the sustained lateral grinding forces of bruxism. They tend to be much thicker and bulkier than night guards, which can push your jaw into an unnatural position for 7 to 8 hours straight. That sustained misalignment can aggravate TMJ symptoms rather than relieve them. Sports guards also tend to be softer, and research from the Journal of Prosthetic Dentistry (2019) suggests that very soft occlusal surfaces may actually increase clenching activity in some patients because the material gives the jaw muscles something satisfying to squeeze against.
Verdict: Fine for one or two nights in a pinch. Not recommended as a regular habit. If you are experiencing TMJ symptoms alongside your grinding, check out our guide to the best mouth guards for TMJ relief for options that address both problems.
Materials to Avoid
The internet is full of creative suggestions, and some of them are genuinely dangerous. Here is what not to put in your mouth overnight:
- Modeling clay or putty: Not food-safe, can contain toxic plasticizers, and will break apart in your mouth while you sleep. Choking hazard is real.
- Hot glue or craft thermoplastics: These are not rated for prolonged oral contact. They can leach chemicals and often contain adhesives that irritate soft tissue.
- Sugru or silicone sealants: Even "food-safe" silicone products are not designed for extended contact with saliva, heat, and grinding pressure. They also do not maintain their shape under sustained force.
- Multiple layers of athletic tape: Yes, people have tried this. It absorbs saliva, breeds bacteria, and provides almost no protection.
- 3D-printed guards (without proper materials): Standard PLA and ABS filaments are not biocompatible for oral use. If you have a 3D printer and want to go this route, you need dental-grade resin and an SLA printer, which starts to cost more than just buying a professional guard.
The general rule: if the material is not explicitly rated for prolonged oral contact, skip it.
When a DIY Night Guard Is Genuinely Fine
Not every situation calls for a $500 custom appliance. A DIY or over-the-counter approach is a reasonable choice when:
- You are a mild grinder with no TMJ symptoms, no cracked teeth, and no significant enamel wear. Your dentist has confirmed that your grinding is minor.
- You need something temporary while waiting for a custom guard to be fabricated, or while you figure out whether you actually grind consistently enough to justify the expense.
- Budget is a real constraint and the alternative is wearing nothing at all. A decent boil-and-bite guard is vastly better than unprotected grinding.
- You travel frequently and want a backup guard that you would not be devastated to lose.
In all of these cases, a quality boil-and-bite or a well-reviewed over-the-counter night guard is a practical, responsible choice.
When You Should Not DIY
There are situations where skipping professional help carries real risk:
- You have TMJ pain, clicking, or locking. A poorly fitted guard can make TMJ disorders significantly worse by changing your bite alignment.
- You have cracked, chipped, or heavily restored teeth. Uneven pressure from a bad fit can concentrate force on already weakened teeth.
- You wake up with severe jaw pain or headaches. This suggests forceful clenching that a generic guard may not address and could worsen.
- Your dentist has told you that your grinding is severe. Heavy bruxism can generate forces exceeding 250 pounds per square inch. Generic guards are not built for that.
Affordable Professional Alternatives
The gap between "fully DIY" and "expensive dentist visit" has narrowed considerably in the past few years. Here are some middle-ground options worth knowing about:
Mail-Order Custom Guards
Companies like Sporting Smiles, Pro Teeth Guard, and Chomper Labs send you an impression kit, you make molds of your teeth at home, mail them back, and receive a custom-fitted guard made from professional-grade materials. Prices typically range from $100 to $200, which is a fraction of the dental office price for a very similar product.
The quality of these guards has improved dramatically. Many use the same dual-laminate materials that dental labs use, and some even offer the same hard acrylic construction found in high-end clinical guards. Our guide on how long a night guard lasts covers what to expect from different material types in terms of durability.
Dental School Clinics
If you live near a dental school, their teaching clinics often make custom night guards at 50% to 70% off private practice prices. The work is done by supervised students, so it takes longer, but the quality is professionally supervised and the materials are identical to what any dentist would use.
Over-the-Counter Hybrid Guards
A newer category of OTC guards uses a harder outer shell with a softer inner liner, mimicking the dual-layer construction of professional guards. Products like the Oral-B Nighttime Dental Guard and the DentalCare Labs guard fall into this category. They cost $30 to $60 and offer a meaningful step up from basic boil-and-bite options in both fit and durability.
Tips for Getting the Best Fit from Any DIY Method
If you are going the homemade route, these details make a real difference:
- Follow the timing exactly. Overheating thermoplastic material makes it too thin and floppy. Underheating it means it will not mold properly. Use a timer.
- Bite down evenly. Concentrate on applying equal pressure across your entire bite, not just your front teeth. Uneven biting during the molding process is the number one cause of a bad fit.
- Trim the edges. Most boil-and-bite guards come oversized. Use sharp scissors or a razor blade to trim any material that extends past your gum line or pokes the inside of your cheeks. Smooth rough edges with a nail file.
- Do a test night. Wear the guard for one night and assess. If it falls out, feels like it is pushing your jaw forward or backward, or causes pain in a specific tooth, do not keep wearing it. Refit or replace it.
- Replace regularly. DIY guards wear out faster than professional ones. Check yours every few weeks for thin spots, cracks, or changes in fit. A worn-out guard is worse than no guard because it gives you a false sense of protection while unevenly distributing bite force.
The Bottom Line
Making your own night guard at home is not inherently dangerous, and anyone who tells you otherwise is ignoring the reality that millions of people use boil-and-bite guards without incident. The key is understanding what a DIY approach can and cannot do.
A homemade or OTC guard can protect your enamel from mild to moderate grinding. It can buy you time while you explore better options. It can serve as a backup or travel guard. What it cannot do is correct your bite, treat TMJ disorders, or withstand severe bruxism forces over the long term.
For most people reading this, a quality boil-and-bite guard or a mail-order custom guard is the sweet spot: affordable, effective enough, and low risk. Start there, pay attention to how your jaw feels, and upgrade if you need to. Your teeth will thank you for doing something rather than nothing.